Note: Additional development times (stand process in HC110) can be found towards the end of this post: Ludington Dunes.
A few months ago I ordered what will no doubt be my last rolls of Kodak High Speed Infrared film. It’s sad to see an old standby pass on, but while online buying film, I decided to pick up a few rolls of Rollei IR400.
I was looking for a film that could produce the same startling infrared affect that the Kodak film delivered. After shooting a couple of test rolls, it seems that the Rollei film is certainly up to that task. Here are a few first impressions of the film, plus tips regarding exposure and development.

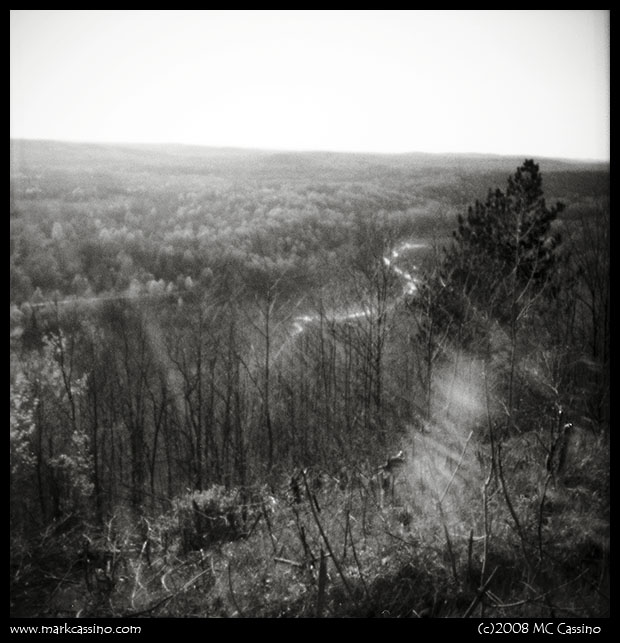
Infrared Photo of the Kalamazoo River taken on Rollei IR 400
Exposure: Without a filter, or with just a #25 red filter, setting the ISO to 400 and metering through the lens worked fine. As with most ISO 400 films, though, I prefer the results at ISO 320 or even 200.
As you’d expect, there is no IR effect when shooting without a filter. And, unlike some other IR films, there is very little IR effect when shooting with a #25 red filter. To get a pronounced IR effect I had to use a Hoya R72 infrared filter.
My first experiments with the IR filter were disappointing. I utilized a 5 stop filter factor, so I metered at ISO 400 with no filter and then increased the exposure by 5 stops – effectively shooting at ISO 12. I bracket up and down a stop, for ISO 24 and 6. Unfortunately, with the R72 filter in place, this still resulted in a grossly underexposed negative.
So the second time around I ramped up the filter factor to 7 - 10 stops – shooting at ISO 3, 1.0, and even 0.5. The shot above was metered at ISO 1.0 and was taken with the R72 filter in place. In bright midday full sun, with the lens at f16, this was a 1 second exposure – pretty darn long and comparale to the digital IR work I’ve been doing. (Just to be perfectly clear for folks trying to wrap their heads around adjusting exposure to compensate for filters – I metered the above shot with the camera set to ISO 400. That gave me a recommended setting of 1/500th of a second. I then clicked the shutter button to increase the exposure by 9 stops to 1 second even.)
The R72 filter was critical for getting the distinct IR effect. The image below compares two shots, one taken at ISO 200 with a #25 Red Filter, and the other with the R72. While Kodak HIE, Ilford SFX, and even the now long defunct Konica IR750 all produced good results with the plain red filter, with the Rollei film the red filter just doesn’t cut it. The technical specifications sheet recommends a deep red filter, but I have not tried that.

Comparison of Rollei IR 400 with #25 Red Filter and with R72 IR filter
Development: Having only shot two rolls of this filme, I processed the first in Rodinal 1:50 and the second in HC110 Dil H (1:66). The roll dipped in Rodinal was grainy – very grainy. The HC110 roll had much more subdued grain, and much better tonal range (of course, that is also a result of the second roll being better exposed.) The successful process with HC110 was 20 minutes and 20C, with agitation one per minute for the first 15 minutes, and every 30 seconds for the last 5 minutes. For the next roll I’ll probably drop the agitation for the first few minutes, and extend the time, in hopes of coaxing out a bit more shadow detail.
Rollei IR400 is the first 35mm film I’ve used that has a water soluble anti-halation / dye layer. While this is generally the rule for 120 and 220 films, I wasn’t expecting it in a 35mm format. As recommended on the Massive Development Chart, I pre-soaked the film for 5 minutes before developing .
In conclusion, I’m really happy with the rest results from this film, and am looking forward to doing more work with it.


 Spring is really at hand – and there is no better way than to celebrate the change in the seasons than by getting out and enjoying some art. This year I’m participating in Battle Creek’s Spring Into the Arts art walk. I’ll have work hanging at two locations – the Happi Convenience Store and Barista Blues Cafe. Barista Blues is in its new location – right next to Happi’s in the ground floor of the 20 story Heritage Tower Building at 25 West Michigan Avenue.


