Posted by mcc on Mar 25 2009 in Announcements, Insect Photography
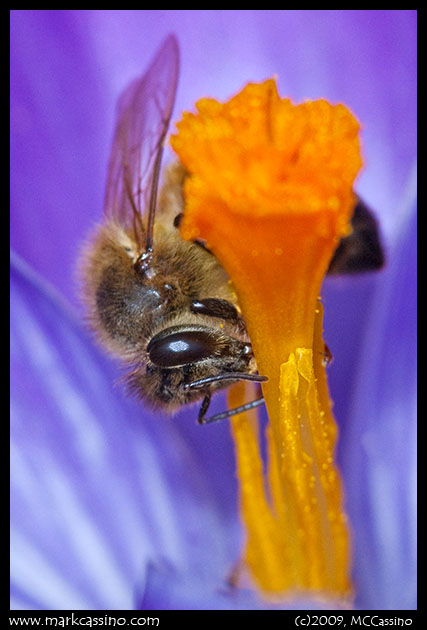
The traditional (for me) honey bee in a crocus shot. Rather late this year, coming in the last week of March…
Two years ago I put together a little comparison of image quality between a medium format film scan and a capture form a digital SLR. (You can see that original comparison here.)
Since then I’ve upgraded both my digital SLR and my film scanner, so it seems like it’s time to perform the comparison again. In 2006 I was shooting with a 6 megapixel DSLR (Pentax *ist-D), these days I’m shooting with a 10 megapixel K10D. Back then I scanned medium format film at 3200 dpi with and Epson 3200, these days I scan at 6400 dpi with an Epson V500.
To facilitate this comparison, I shot the same scene with both a digital SLR and medium format camera, and then processed the respective images.
The medium format camera was a venerable Pentax 6x7 with an SMC 67 55mm f4 wide angle lens. The film used was Kodak Portra VC, 160 ISO. The negative was scanned on an Epson V500 - a mid-range consumer flatbed scanner. Digital ICE was on while scanning, to take care of dust. (This may have some impact on sharpness and detail in the scan.)
The digital capture was taken with a ten megapixel Pentax K10d with a 16-45mm SMC-ED DA zoom lens. Both shots were taken at f16. The camera ISO was 400. There is a slight difference in the angle of view and framing between the two shots, which is the result of setting up to separate tripods and not lining things up perfectly. The images were taken last fall – I’m just now getting around to looking at this.
So let’s take a look at a scene taken with the two platforms, and see how they compare…
First, let’s consider the size of the image. Scanning a 6x7 cm negative at 6400 dpi produces a really huge digital file. Here’s an image that illustrates that:
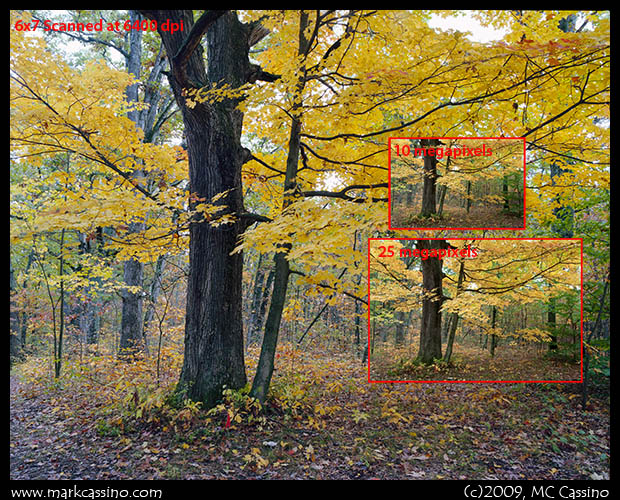
This illustration shows the relative size of a 6400 dpi medium format scan, compared to a 10 megapixel digital capture (the smaller inset box) and the same digital capture opened to 25.3 megapixels in Adobe Camera Raw. Yes – these is a very substantial difference in size!
The film scan is roughly 17,500 x 13,700 pixels in size – just under 240 megapixels in total. At 300 dpi, the full sized film scan would print at 58 x 45 inches. By comparison, the larger of the digital captures – which, of course, has been up-sampled in Adobe Camera Raw – is 6,114 x 4,113 pixels. That’s just over 25 megapixels and at 300 dpi would print at 20 x 14 inches.
So without a doubt, the medium format scans are larger. But how much more information is in that larger image? After all, digital gets a real boost due to its superior ability to produce sharp edges (acutance) and much lower noise / grain levels.
Comparing detail, and showing it on the web, poses a bit of a challenge. I decided to take two approaches. In one case I up-sampled the digital image to make it equivalent to the film scan. This is a bit unfair to the digital image, since it pushes it to sizes never intended for it. In the other case I down-sampled the medium format scan to make it the same size as the digital capture. This is a bit unfair to the film scan, since it basically discards and ignores one of it’s main advantages – the huge image size that it supports.
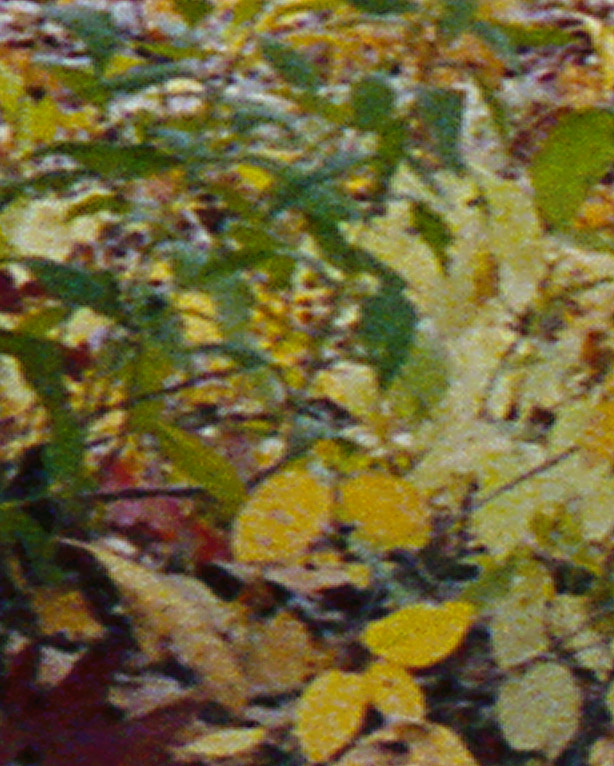
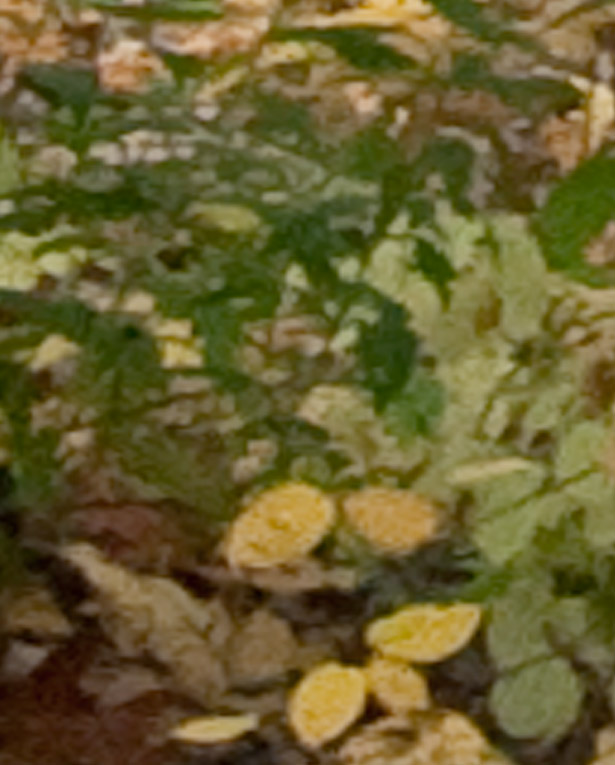
Here are the two comparisons. In this case, I up-sampled the digital image to be the same size as the film scan. To do this, I first opened the image at the 25.3 megapixel size in Adobe Camera Raw version 5.3. I then up-sampled the image in Photoshop, using the Bicubic smoother option.
Here is an “actual pixel” sample from the medium format film scan:
Here’s the same portion of the image, at actual pixels of the up-sampled digital capture:
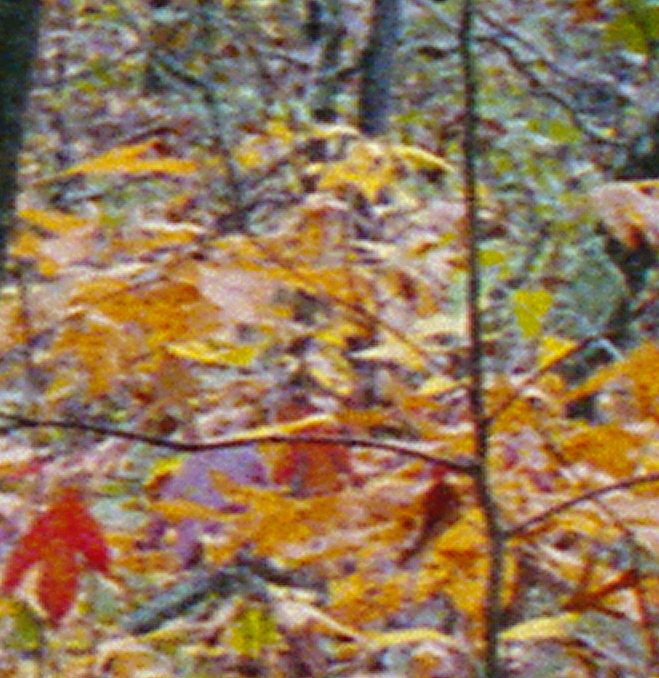
Here’s a second example – film first:
Now digital –
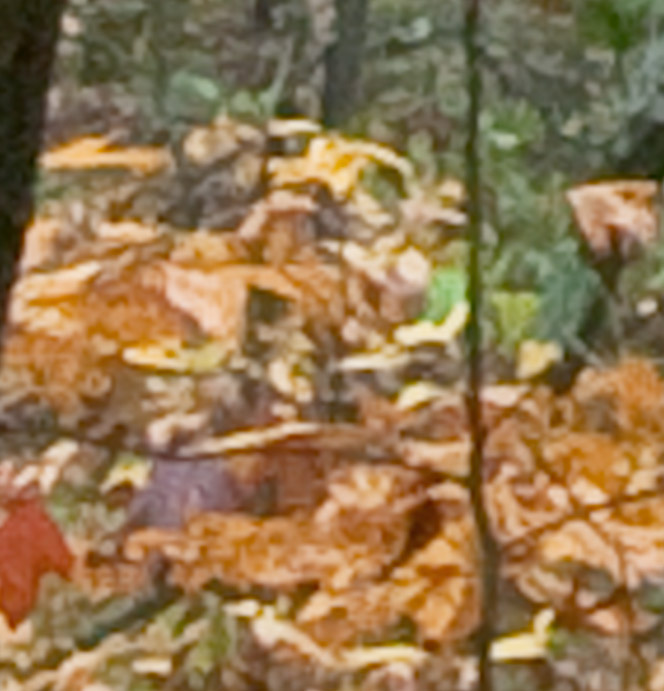
What can we conclude form this? Clearly, the medium format scans hold a lot more detail. In fact, disregarding comparisons, there is simply an impressive amount of detail in the medium format film scan. There’s no doubt that if you want to print large, going with medium format is a much better choice.
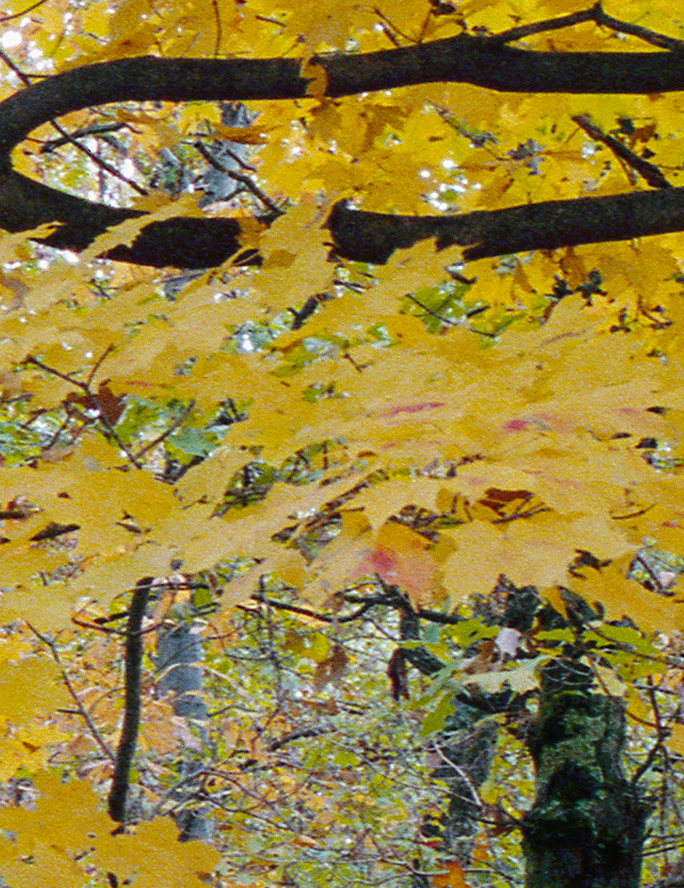
Now here is a comparison of a down-sampled film scan and a 25.3 megapixel digital capture. The digital capture has still been up-sampled within camera RAW, since comes from a 10 megapixel sensor. The film image was down-sampled using the Bicubic sharper method. First the film sample:
Now digital:
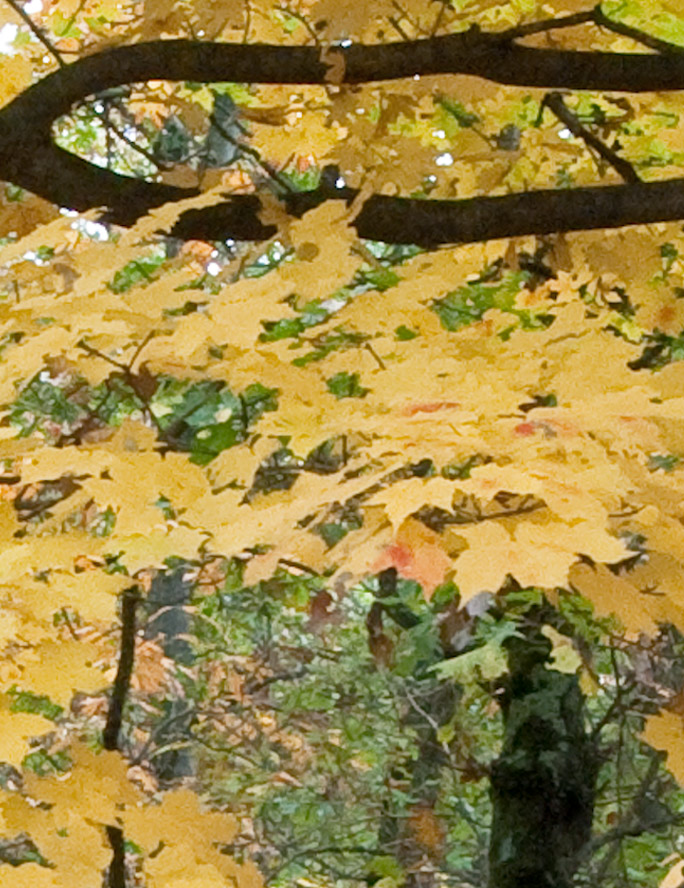
The differences here are less pronounced. There is clearly superior detail in the film scan, especially in the brambly branches and twigs towards the middle bottom of the frame, but the difference is not as marked. A bit of noise from the grain is evident in the film sample. To my eye, the leaves in the film capture have a much more realistic look to them, due to the better level of detail. But I’m not sure that much difference would be apparent in a print.
I think the images speak for themselves, and you can draw your own conclusions. One thing that I cannot demonstrate on the computer screen is the advantage that medium format gains by being able to print at a higher resolution. I’ve made a few 16 x 22 inch prints of this image from the medium format scan. The native scan is so large I print it at 720 dpi, and even then need to down-sample the image by 15% to get it to fit. The 720 dpi print really captures the great detail in this shot, and makes for a ver high quality print.
As I’ve noted in earlier essays - like Stuff Per Pixel and Film Vs. Digital Photography – digital has a long way to go before it can achieve the level of resolution and detail that film offers. As I’ve also noted before, a lot of subjects do not have a high level of visual detail in them. For things like close-ups, architectural shots, portraits, etc., the advantages of digital probably outweigh the superior detail and resolution that medium format can deliver.
But when detail is important, medium format really shines. Digital conitnually advances, and in time I’m sure someday I’ll give up on film. But for now, medium format film, even when scanned on a modest scanner, still outperforms digital for detail-rich shots of scrubby, brushy, woods.
Several weeks ago I was wandering around eBay, looking for bargains in 120 roll film. I didn’t find any, but the search led me to look at cameras, and of course that led to trouble…
A particular type of camera really caught my fancy – antique (or classic) folding medium format rangefinders. A couple of years ago a friend gave me an old Kodak Retina-A folding rangefinder, and I really fell in love with it.
The idea of packing a medium format camera that, once folded up, was only a little larger than the Retina A was just too compelling. Thanks to the Retina A I’m accustomed to zone focusing, so even working with that constraint is acceptable.
After a few weeks of searching and researching, a great camera came along on eBay – an Agfa Isolette III.
The specimen I bought looked like a beauty. The bellows looked to be pristine (turns out they aren’t) and the lens and camera overall looked very clean (which they are.) The lens focusing mechanism works perfectly.
Shortly after the Isolette arrived, I hightailed it the graveyard across the way to see how it worked. The graveyard is my honored testing ground for new cameras and lenses – the square stones give a good sense of how rectilinear the lens may be, and the rolling hills and trees give abundant opportunity to test a lens under different circumstances.
A roll of Agfa APX 400 was used for this test. The first frame was sacrificed to test the bellows – I just advanced the film, opened up the camera, and held it out in the sunlight for a while. After that I just wandered around a bit, and shot whatever seemed interesting.
Getting home, I souped the APX 400 in Rodinal 1:50. Pulling the film out of the tank, I was disappointed to see that the first frame was not blank I hoped. Despite appearances, the bellows is indeed fraught with pinhole leaks. I later examined the bellows in a dark closet with a very bright flashlight, and confirmed this myself – the leaks are pinholes, but definitely there.
Despite the light leaks, the images I took were not ruined. In fact, the ones where the film was quickly advanced shoe very little impact from the pinhole leaks. Studying these shots reveals a very sharp and contrasty 6 x 6 cm negative – which works for me.
So, the camera will have to go off to get re-bellowed. But when it’s refurbished it will be a great addition to my digital camera bag. I’ve tried carrying TLR’s with me, but they take up too much space in the camera bag. The folding rangefinder and a couple of rolls of film will fit comfortably into my digital camera bag, and it will be great to be able to switch over to MF film at any time.
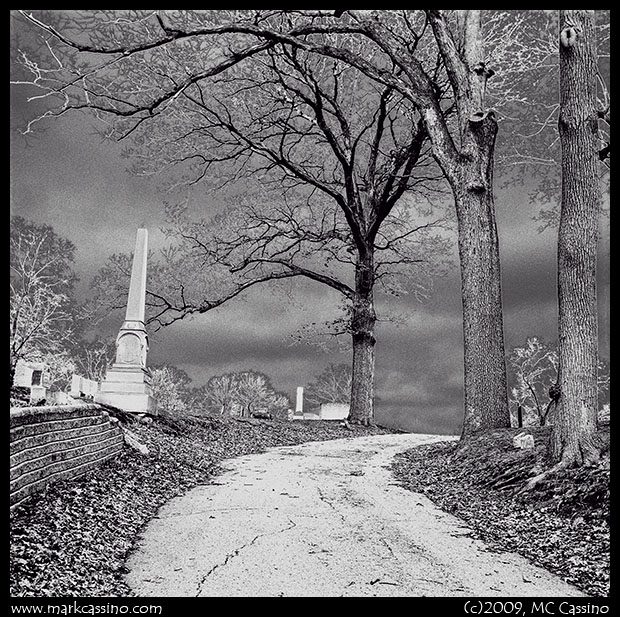
Here’s one shot from the cemetery – yah, I played around with the curves to give it a bit of a solarized feel:
After a bit of dawdling, I finally got around to downloading Photoshop CS4. Part of my reason for procrastinating with this upgrade is that I had heard about problems and limitations of running CS4 on 64 bit Windows XP Pro (the x64 edition.)
In my case, the rumors turned out to be completely wrong. I downloaded a trial version this morning and applied the registry tweak described on Adobes’s site (here). I then checked the “Enable OpenGL Drawing” box, found within Photoshop under the Preferences -> Performance tab. And voila – the zoom and rotate tools work like a charm. I can’t say that these tools are going to change my life, but the bird’s eye zoom looks like it will be very handy when doing detailed adjustments.
I was particularly happy to see that the GPU features worked on my x64 machine. It’s just my subjective impression, but CS4 actually seems to be a bit faster than CS3 – which is nice. FWIW – my rather aging PC is an Athlon 64 x2 4200 with 4 gigs of ram and a GeForce 7600gt video card. Definitely not a powerhouse.
I went back to a couple of RAW files I had passed over last summer, and ran them through the CS4 camera raw. It would be easy to not even notice the adjustment brush and the gradient filter tucked into Camera Raw – but they are worthwhile enhancements.
The interface is somewhat different – I can’t say that it strikes me as particularly better or worse. All morning I have been accidentally closing the whole application when I want to just close out a file… “Oh – the little ‘x’ is over there now, not up here…” But heck, it’s only been a few hours and by tomorrow the new interface will be old already.
Overall this was a worthwile upgrade and after a couple of hours of playing around I bought a serial number from Adobe. Here’s one of the shots from last summer, processed in CS4:
Update, March 12, 2009: After a few days of running it through its paces, I’m happy to say that 64 bit Photoshop is still working fine on Win Xp x64. The opengl effects are a lot of fun, and they’ve been working flawlessly – in the 64 bit version of the program. More important – the 64 bit version of Photoshop really sails through tasks. Even with large files, it is very quick and responsive – and I’m only giving it 2.75 gigs to work with.
The same I not true with the 32 bit version of Photoshop CS4. Here images break up, go blank in spaces, and even come together all akimbo after successive zooms and rotations. The situation is made much worse when a lot of images are loaded. As an experiment I loaded 6 different images, all in the 200 – 250 megabyte size - and ran them through a series of simple zooms, flips, and rotations. Everything worked flawlessly in the 64 bit version of PS, but in the 32 bit version the images quickly looked like a mess, with mis-rotated parts and blank areas. I should emphasize “looked like” a mess because the images themselves proved to be fine – only the display was garbled. I assume this must be a bug in the 32 bit video drivers for my video card.
Since I plan to work in the 64 bit version most of the time, this isn’t a major issue. I stumbled into it while scanning some prints today – the scanner drivers only work in the 32 bit version of the program.
I heard a bird sing this morning, an hour or so before dawn. That is a sure sign that spring is coming. Of course, the days are longer and the snow banks are steadily shrinking. Another season of snow crystal photography is drawing to a close.
A few new shots taken in late February are up in the Photoblog. In past years I’ve gotten one or twp snow crystal shots as late as early April – and the weather is certainly getting unpredictable so who knows. But early March is usually the end of the season.
It’s coming right up! The Garage Sale Art Fair is this Saturday at the Kalamazoo County Fairgrounds. I’ll be there with hundreds of matted prints, price to sell. Come on by!
For more info, see www.garagesaleartfair.com
For me, February is a slow month for photography in Michigan. The snow is waning but wildflowers, insects, and other subjects have yet to emerge. The landscape is bleak and barren – dried grass, fading snow, leafless trees.
I suppose I should do something productive with my time, but earlier this week the urge to get outdoors took hold and I found myself driving on muddy dirt roads, seeking some of my favorite places in the Allegan Forest. If there is beauty in barrenness, then the pine barrens in February is the place to behold it.
Much of the snow has melted. What hasn’t melted has thawed and re-frozen, so it is hard and you can walk on it without sinking in. I visited several places, but spent the most time in a field off 48th street. The snow was peppered with deer, coyote, and snowmobile tracks.
I lugged the Pentax 6x7 outfit down to the seasonal marsh, where in the summer dragonflies abound. The water level was astonishingly high – the thawing ice covering the marsh was at least 20 feet further in than where it was last fall, and then it was several feet further in than prior years. Maybe the seasonal marsh is heading to be permanent – the smooth ice surface, with no reeds or cattails breaking throughlooked more like a pond than a marsh.
Well, it was a good way to spend the day. I tested out the new 45mm lens I bought for the Pentax 6x7, and loved the wide angle perspective. I also shot out some film stock, using my last 120 format rolls of Efke R100 and Ilford fp4. Soon I’ll be tapping into the large stock of Agfa film I laid in before they went out of business – and who knows what will be available to shoot after that.
It’s yet February, but things are starting to warm up.
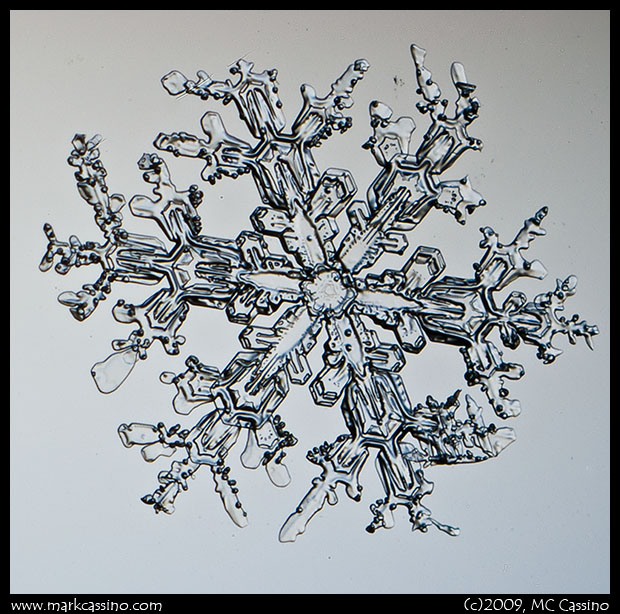
Snow fell for a few hours yesterday - just tiny small crystals and ice dust. It was warm with temps hovering right at the freezing point, and the small dust bits melted almost instantly as they hit the glass. The snow crystals were not far behind them.
It wasn’t a real productive session - but I like the water droplets with the two small snow crystals. One other shot is in the Photoblog.